Monday, November 4, 2013

More time or another me!

I decided that I either need more time or another me around.  It seems like there is so much to do right now as we are trying to sell our house, FSBO style, and with the holiday season upon us.  I barely got into the Halloween spirit and missed being more excited about it.  I really love Thanksgiving (even thought it seems like now all people can talk about it Christmas) and hope that I can get the spirit of it before the day before.
I know I can't have more time or another me...well I could have more awake time, if I sacrificed sleep, but a grumpy mom on top of a already frazzled one, just might not be worth it!!
Anyway, I know I can't have time or a double, but if I could I think that I would pick another me over more time.  With another me I could put one to work getting the things done and feeling "productive" and then I could spend MORE time sitting with my kids, reading to them, making cookies with them (aka a small mess), doing thoughtful things for their dad, or going on walks, enjoying the last few days of warm before the cold and even then, maybe I would be more willing to get all bundled up and go outside knowing that all the extra layers and laundry would be manageable with another me to help. Another me to be a cute, thoughtful mom and WIFE would be AmaZing.  

Well I just had to clear my mind and type out this thought so that I can realize what it truly important and have some renewed energy to keep going, since as my mom always says, "this too, shall pass."  

The things I want my kids to remember is that they are loved and that I love spending time with them...not that a clean house was more important.  Now back to cleaning, or maybe I'll read a book with my kids first!!

Thursday, October 10, 2013

Reflecting Thoughts

I don't know what has been the cause of my reflective thoughts lately, being another year older, having another child, having a child start school.  Maybe it is a combination of all.  Either way it seems like I spend a bit more time thinking about who I am and more so, who I was in school.  I think I was (and probably still are) a bit naive as to what is going on around me.  I think of the people who have come and gone in my immediate circle of daily life.  Some I know a little bit of what they are doing now, some I have no clue and some I wonder what they are up to.

I think some of my reflection is school, and the pressure to fit in, or the idea that "those are the most important things" when now they are such small importance's (i.e., friends, dances, being popular, etc) I was the witness of some teen girls "cattiness" and after about 25 minutes of it I finally opened my mouth to hopefully help one young girl see that her actions were not nice.  Who know what came of it...probably that I was some withcy woman sticking her nose in another's business.  But when you are right in line behind them for that long of time, it is hard to not want to do something.  But in the 24.5 minutes I stood there just listening I was thinking how SCARY it will be to have a kid that age and the social pressure they will have to deal with.

Maybe if I felt my memory was better I could remember what it was like for me.  But I don't, sadly to say.  I don't remember the "cattiness'' that people say girls are.  I don't remember the desire to be cool or fit in. Maybe I wasn't or didn't, or maybe I was taught that it didn't matter.  I worry that I won't be able to help my kids the way I was helped/taught.  I wonder if I will be the kind of parent they can turn to.  Sometimes I worry I won't because I don't think I was the friend that was even the one someone turned to for help.  Sad to day but I have been wondering if any of my "friends" from years previous were positively impacted by me, or if they wish they stayed in better touch like I do.  And maybe that will have no reflection of how my parenting will be.

My mind is all over the place here, but I guess to anyone who ever reads this, maybe it will help them see that they are not alone in reflective thinking.  Maybe.  Maybe Not.  Most of these are just thoughts, not questions.

Bottom line I guess that I take comfort in when I am reflectively thinking is that I am (we are) a child of God.  He loves us, He is there for us.  If we strive to do those things that keep Him in our life, we will be happy in the end, we will be BLESSED beyond contemplation.  He knows us, He LOVES us.  He will guide and help us, and He will send people into our lives that will also do the same.

I probably should just archive this in my computer somewhere and not post it because I a not an eloquent writer but even if I keep it to myself until I think clearer or write better, I will have forgotten and no one will see that there are other people out there with the same reflective wonderments.  I guess it's my attempt to get thoughts out there (I would say on paper, but this isn't paper and I am not sure what the new term would be) and help myself and anyone else.

Monday, April 8, 2013

Simple Horse Birthday Cake

So for my sons birthday he wanted a horse cake.  I pulled up some images on Google for him and after eliminating all the hard ones for him because I am no professional, he basically got to choose from 2 simpler cakes, a full body horse, or a horse head.  He chose the full body horse.  Since it is actually a cake pan that I don't have and didn't care to buy, I improvised.
I made two 9x13 cakes, one white and one chocolate, the night before I decorated them.

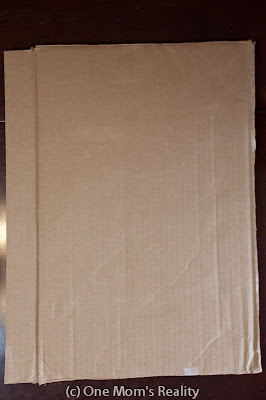
For my base/cake board, I cut some cardboard boxes up to give me two layers big and strong enough to hold the 2 cakes.

I drew a horse similar to the one from the picture seen online (and don't laugh because I am no artist!) using two plain pieces of standard size copy paper taped together. (I made sure my 'cake board' was bigger then my drawing) 

I then used handy dandy tinfoil to wrap the cardboard and fancy it up :) 

I just taped it to the back like this...nothing to fancy but also it didn't require going out and purchasing anything! 

I used wax paper as a template to transfer my drawing onto the cake (since drawing it a second time would be near impossible since you can't erase on frosting!!)
I just laid the wax paper on top then used a black marker to trace the main lines needed. 

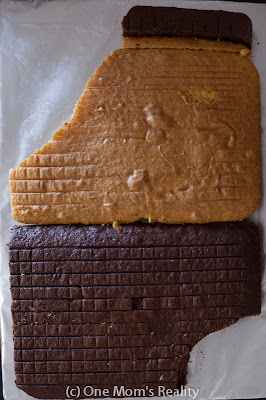
I then laid my two cakes on the board and cut them to give some shape and then also because my drawing was just a little taller then my cake I needed to add some length by using the scraps I just cut off (like I said not professional but easy)


I then made some chocolate frosting and covered the cake.
I also used a scrap piece to create a horseshoe for a spot to put his name and age since I didn't feel like making cupcakes like the cake online had.

I overlaid my wax paper template then used a tooth pick to indent the lines (I just traced the line with the toothpick and it did the trick!)

I then created some black frosting using my extra chocolate frosting and using a size 6 circle tip outlined the horse and filled in the hooves.  I used a Wilton 21 tip to create the main and tail.  Then I made some red frosting (because my son wanted a red horse but settled for red accents!!) to give the horse a halter and then to border the cakes and write his name and age.

It was pretty easy (and has lots of imperfections just like me;)) and the best part was that he loved it and it fed all of our guests with a little to much to spare!

Tuesday, March 26, 2013

Easter Games for Preschoolers

So I was asked to help with the Easter party at my son's preschool.  I have helped with some others and we have done "Pin the nose on the snowman" and Valentines Bingo, so I was trying to think of something else to do.  So of course I went to google typed in Easter games for preschool, but wasn't really finding anything that I liked.  So...I went to pinterest and typed in Easter games and there were lots of pins.  I visited many of them and narrowed down the ones I like the best and thought I might as well share them.

This first one is more for getting wiggles out:


I liked this one.  I reminded me of the Cooties game.  I am not sure this will work as is for the preschool class because they may not be able to draw so well yet, but it gave me the idea to make the body parts and then when that number is rolled they "build" the bunny like you would the Cootie's game.


Here is a site that has a list of games, like 
-guess the number
-Easter Bunny says
-Easter word find
-and some craft ideas


This is an ESL site and there is only this PDF but I liked the swinging toss egg idea.  Almost like a different version of a pinata.


This site creates an egg hunt looking for a specific color match-up of eggs.  Great for teaching kids.  I thought that it could easily be adjusted for my sons preschool by having them make the mixed up color egg after choosing the egg card.

Here is a site that has some great PDF's.  I already used a bingo style game so I probably won't use this one, but great to have on hand for the future.
It also has a printable for  "bunny, bunny who's got the bunny" (to be played like button, button who's got the button), and Easter tic-tac-toe and a few others.


This of course is not an all inclusive list, but just some that I liked for the age group I deal mostly with (that would be under 5!!)
ENJOY


Sunday, March 10, 2013

Cars Cupcake Birthday Cake

This year for my son's 3rd birthday he wanted a "car" birthday cake.  When I used Google Images to looks at different option with him it became quite clear he wanted a "Cars" birthday cake and anyone would do.  Knowing that I was going to use cupcakes, we settled on a dirt track with cars on it.  I think it could have been any cake with a 'Cars' character on it and he would have been happy.

I put my cupcakes as close together trying to achieve an oval shape, then used a white 1" ribbon wrapped around to hold them together.


The one that that I didn't do that I learned was a mistake, was to secure the cupcakes to the base.  They just slid as a group and I didn't realize this until it was a little to late to solve the problem.

Sorry it was late when I was trying to finish the cake and get it hidden for the next day, so the pictures are a little lacking and I had to use a really shallow focus in order to get enough light.

Anyway frost the cupcakes like they are one unit, just making sure that the frosting is think enough to hold and not just fall through the gaps between the cupcakes.  I used green since I knew that I would be piping on green grass to top it off. 

My race track was crushed up oreo's, with the 'walls' being just a part of the oreo.  Once I scrapped off the cream, I just used my frosting spatula to score a line in the cookie and then it would break right where I wanted it to.  I only used maybe the outside 1/4 of the cookie (so I got two 'walls' from each one chocolate wafer) and then just threw in inside in with the others to be crushed up for the dirt track. 

I then used a grass tip to pipe grass where the track wasn't.
I made some Checkered flags by using a black marker on white paper and then taping it onto a tooth pick.

My son had picked out some 'Cars' toys that we put on the cake. And that was pretty much it.  It was quite simple and took less time then I thought it would.

Top view 

View from the side 
I then added a candle for his age and a little cut out of the cardboard box the cars came in with his name to personalize it. 

Hope this helps you in any way :)

Sunday, March 3, 2013

'Mommy I made Potty'

So have you seen the Bleach commercial "mommy I made poopoo?"
Here is the link to it on you-tube if not (http://www.youtube.com/watch?v=Imz6jdTME0w).

Well... we had our own little version of this last night.  My kids were in the bath when I could hear the youngest kind of whining, which she usually does after being splashed by a sibling or when she is ready to get out, but this time I went in to discover bobbing in the water by here was some poop.

I pulled out the older kids and sent them to our shower with their dad to assist, while I drained the tub, cleaned it up and then washed my daughter off.

This commercial just was running through my head and despite the fact it is kind of a gross thing, it is kind of funny.

I would have to say that I think all my kids have now done this (pooped in the bath) and around this same age.  It almost comes around the time of potty training...so maybe now my little one is ready to start being potty trained if she is like her older siblings (or at least I can hope so!)

Friday, November 30, 2012

Do it Yourself Canvas

Having a young and constantly changing family, I wanted to do something with some recent family pictures that wouldn't cost a fortune.  Pintrest has several ideas of DIY canvas prints.  After looking at several I attempted following 2 .  I will compare them at the end if you are interested in how I felt they turned out.  I included a couple other blog DIY tutorials in case you want to attempt them.
 
Girl in the Air did a 4 foot by 3 foot canvas.
A Beautiful Mess did a canvas that turns out more distressed.
This Thrifty House did multiple pictures that are very similar to what I did.
Literally Inspired is the other blog I attempted.
 
I purchased the Styrofoam from a local "home do it center" for $5 and I got more then enough.  I will keep it and use it for the next few years when I update our family pictures.
 
I purchased the black canvas from "Hobby Lobby" and used one of their weekly 40% off coupons.
It cost under $5.
 
Everything else I had already on hand.
 
1.  To start I took the prints that I wanted to turn into canvas and traced the outline on the Styrofoam.
 
2.  I then used a craft knife to cut the Styrofoam. 
I found that holding it vertical, (pictured above) stabilized on the bottom, made for a cleaner cut then a horizontal cut (pictured below) which turned out more jagged. 
Probably because I could put the entire blade through the Styrofoam and use a small sawing action but when horizontal the blade couldn't cut cleanly through the entire part with the sawing action and without the sawing action/using just a drag of the blade would tear out little chunks of the Styrofoam.
 
3.  I then laid the cut pieces of Styrofoam on the canvas and cut leaving 2-3 inches of extra material. 
 
4. Staple the material to the Styrofoam.
Using a medium duty staple gun I stapled 2 sides (opposites) of the canvas to the Styrofoam 
spacing the staples a few inches apart ensuring the keep the material tight and free of wrinkles when stapling the second side. 
 
5.  To staple the last few sides I cut the material directly in line with the corner 
then folded in the side already stapled (staple it, it will lay better when folding the last piece) 
Fold up the unstapled side. 
cut or tuck the corner then proceed to staple along the entire side.   
The doubled layers of material was a tough section for my medium duty stapler to go into so I attempted a couple of spots until I felt the staple was holding well. 
 
6. Tape over the material.
I think this will help keep the staples in place and also adds a second adherence for the fabric on the Styrofoam. 
You can probably use any color of duct tape.  I used black to match the material color.
I would recommend cutting the duct tape because it makes a cleaner edge and sticks better.
 
7. Iron the canvas making sure to get the edges.  This really helps.  I skipped it initially, but then went back and ironed them.  The heat also seemed to help the canvas stick to the Styrofoam, making a cleaner look and sharper corners.
 
8.  Adhere the picture.
I used Mod Podge and a sponge brush.
 
Covering the entire area where my picture would be.  I also covered the outside edges on personal preference because it gave a shinier look to the black canvas. 
 
After laying the picture on the Mod Podge covered canvas, I rubbed the entire picture with a soft cloth making sure there were no bubbles.
 
9.  Optional step but I wanted to make sure it didn't bubble: 
I flipped the canvas over onto a cut ziplock bag on newspaper (as a protection for my table in case any glue oozed out the edges (which none did...but I didn't want to risk it).
Then stacked magazines (or books, just something heavy) on top until the glue was dry.
I think it would only take an hour or so, but I didn't actually time it. 

 
I then attached a "Command" picture hanging strip to the back.
I felt comfortable only putting one strip on since the Styrofoam canvas was light.
 
This is a store bought art canvas that I painted black on the edges before attaching a picture the same way as I did to the Styrofoam. 
 
Both types of canvas's (Styrofoam and store bought) were quite easy.
 
PRO's for the Styrofoam:
-You can cut any shape you want, i.e. 8x10, 5x5.  Traditional or non traditional sizes.  You can even make very large size prints if you but a larger piece of Styrofoam.
-Very cost effective
-Super light and easy to hang
 
CON's
-Edges may not be as clean as a store bought canvas (Ironing will really help this though)
-You need more 'equiptment' to cut and assemble.
 
PRO's for the Store bought canvas:
-Quick and Easy
-Sturdier feel
-Requires very little to assemble
 
CON's
None really.  It is slightly more expensive then the Styrofoam canvas, but both are much cheaper then a store canvas print.
 
Also I would recommend not Mod Podging the top of the picture. It is a personal preference but I didn't like the streaks it left (pictured below)
 
I made one store bought canvas print and 10 Styrofoam canvas (varying in size from 11x14 to 4x4)
 
Here are 2 of my finished canvas's.
I took a little black paint and 'edged' the pictures just to help the white of the side edge of the picture not stand out so much.
 
Can you tell the difference from the store canvas and the Styrofoam one?
Store bought art canvas on the left.
 
Hope this helps you decide which method to go with.